Thursday, May 31, 2012

Thoughtful Thursdays: Down Time!


Can I just say how happy I am that it's Summer? Here at the shore, I call it summer as soon as Memorial Day weekend rolls around. Well, actually I call it Summer as soon as a weekend day that's over 70° rolls around. And I just love to spend my down time at the beach. It's only a short 3-block walk from my house, and I love to bring lots of reading material, sketchbooks, pencils, and other projects I might be working on at the moment. I've pinned sewing projects, cut out material, stuffed dolls, collaged, pasted, painted, glued and journaled on the sandy shores of Ocean Grove, New Jersey! And sometimes, I just sit quietly in my beach chair and do nothing but listen to the waves crashing and the seagulls cawing. It's a total recharge for me.

So... what's your favorite Summer down time activity?

Tuesday, May 29, 2012

Coming To Life...

It took about a month, but from hand drawn images scanned and manipulated on the computer...

...emerged 30 custom Knock Down Dolls for a boardwalk themed wedding. The bride and groom are actually creating a full game setup for their reception. Hooray for the happy couple!

Thursday, May 24, 2012

Thoughtful Thursdays: Boardwalk Inspiration!

 
I seem to find inspiration everywhere. And because I'm always looking for stuff to recycle and repurpose, I'm usually looking down at the ground. But this time... hanging out on the Coney Island boardwalk.... things were... well... looking up! I couldn't help but notice this burger boy and his beer carrying burger girl, perched atop a concession stand!

They were so simple in their design, and so retro in their look... and I thought they would make such cute PaperClay dolls! I've always been a fan of the Bob's Big Boy burger boy and these local, folk-art style versions just made me giddy. And hungry! Burger, anyone?

Tuesday, May 22, 2012

Ch-Ch-Ch-Ch-Changes...

Since taking Mindy Lacefield's Paint Your Story workshop, I've been playing around with creating backgrounds. I've been loosening up, letting go a bit more, learning to cover my mistakes, and getting lots of do-overs! Being a "recovering perfectionist" this has been a huge leap for me, and I thought I'd take you on a little journey of what my brain thinks when I'm on such an adventure. So, here we go!

I think the house was standing out too much, having black in it... so I outlined the clouds and numbers in black oil pastel to balance it out. And, after watching a marathon of American Pickers and seeing Mike Wolfe trying out an old-timey highwheel bicycle... well, I had to add one in my painting...

Whoa! What the heck happened here? Well, the clouds were looking a little too childlike for me. Too cute, I guess. So I tried to cover them up. But they were actually created using bleeding art tissue paper (new to me too!), which — as their name suggests — bleeds through the layers and layers of paint you put over it! So first I tried scribbling in the clouds with black oil pastel, which worked. But I hated it. So I just found the darkest color I could that wasn't black, and masked out everything but the rainbow. I added stars into the new night sky. I kind of liked it.

Well, damn, if I liked it... what the hell happened now? Sheesh! I "pulled" the blue paint down into the white section that led up to the bicycle and the house. I tried to lighten the navy by overpainting some lighter blue over top. But I didn't like that and expressed my frustration across the whole sky, writing with red oil pastel! It says, "this is so hard for me. I just don't get why I'm having such a hard time making backgrounds. But I'm not giving up yet." I also changed the orange dots on the left to red, and the red dots near the bottom to pink. Okay... I like that. But that big blue spot under the rainbow...

Hey! Now what? A skull? Yup. I was so angry at how things were going that I thought I'd make a skull right there under the rainbow. Didn't like that at all. Not sure why... but it just didn't go. So I tried to cover it with red paint and that didn't work. So I let my primitive brain take over and just made marks and lines down the side and a cool banner thingy across the top. Okay, well that stuff I like. Now what to do with the sky?

Yes! That's it! I'll just cover the whole thing up! I didn't mean to. But I used my fingers to add a lighter bluey-aqua paint over top. I had to add several layers because it was so light over that dark background, but I love the way it still shows through. I balanced out the bottom by bringing the pink all the way across and added a few stars in the upper right corner for visual balance. And I haven't touched it since, because I love it just the way it is. But I'm still not sure if I'm done.

This is my brain on art.

Saturday, May 19, 2012

Shop Update: Rag Dolls R' Us

Just dropping by to let you know that my motley crew of misfit ragdolls are now available in my Etsy Shop! Lots of different styles to choose from, and a whole range of characters from the awkward to the kooky, to the yummy and delicious variety — like these 3-tiered cakes!

Some are the bestest of friends!

Some are just full of themselves. Ugh... too much ice cream in my belleh!

Some give me a headache... or should I say toothache?

... and some are a little crabby! But they're all so lovable and they would be happy to find a new home. Check them out in the new Modern Vintage Rag Doll section of my Etsy Shop!

Thursday, May 17, 2012

Silkscreening On-the-Fly, MacGyver Style!

Me...well I needed to print 60 bases to use for the Knock-Down Dolls I create. But maybe you took a silkscreen class and you have this great screen but no support. Or maybe you bought a screen at a craft store but can't afford a $250 silkscreen machine to go with it. And maybe you want to print like a gazillion same-size something-or-others in a neat and consistent manner but you don't have access to silkscreen equipment. Well fear not! Lady MacGyver is here to show you how to silkscreen on-the-fly!

First you'll need a shallow box like a shoebox top. Mine's attached, so I'm going to cut it off. Cereal and snack boxes also make a great surface for a one-time silkscrening session! Just cut off the largest panel (you don't even need the sides). If you have a bigger screen, get a bigger box, just make sure it's kinda flat and not so corrugated.

You want to mark off the area of your box that you're going to cut out, based on the size of your screen.

Make sure to make the hole large enough so that you have room on each side of your screen for ink and taping (see a few steps below).

Secure the screen to the bottom of your box first. You want it to be flush with the bottom of your substrate for ideal printing. Tape all sides with packing tape and cover up any open areas (like the one I have here in the bottom left corner).

Tape the screen to the inside of the box on all sides...

...making sure that your "squeegee" (I'm using an old hotel key card), has a clear, flat path inside the taped areas, or your screen may not print evenly.

Because I'm screening a dimensional item, I'm going to actually use a couple of the items as "risers" for my screen setup.

Secure your makeshift screen assembly in place by making a hinge with packing tape. If what you are printing is flat, you can just tape your assembly directly to the table.

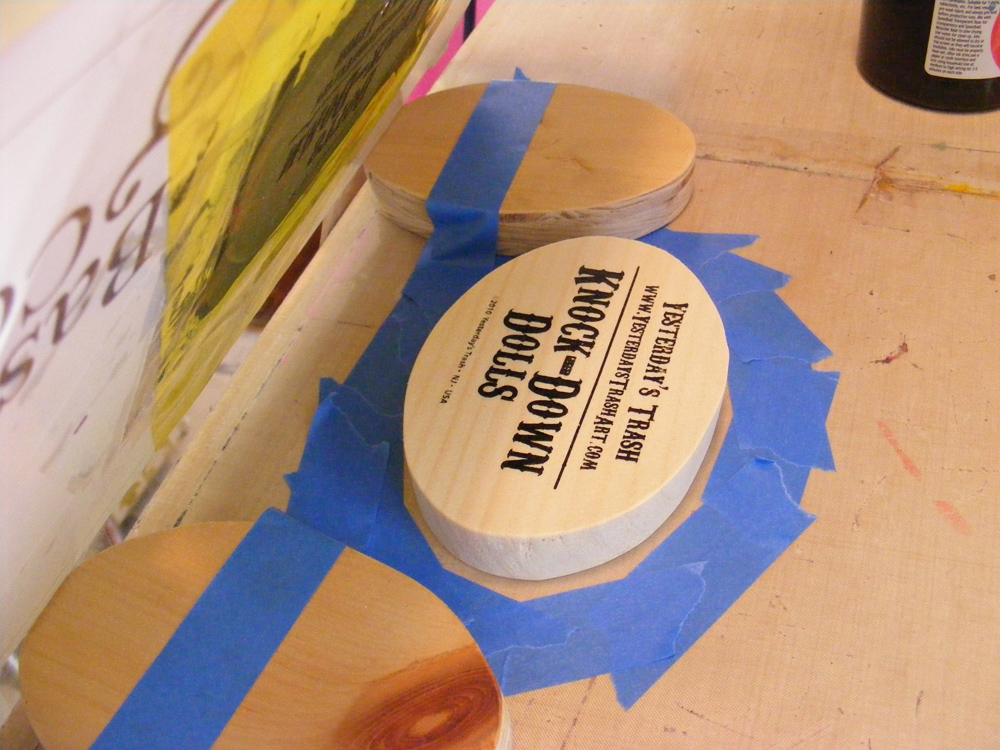
Next you're going to line up the actual object to be printed with the image on the screen.

Tape around it to mark your area. My object is round, so I used smaller pieces of tape to define the oval shape.

Once your object placement is marked off, use a popsicle stick to place ink onto your screen on one edge of the image.

Draw ink smoothly and evenly across the screen with a slight downward pressure...

...and Violà! A perfect silkscreened image! Repeat a gazillion times.

My bases are now ready for their many, many, many Knock Down Dolls! And it took me less than an hour to make 60 of them.

A here's a few final tips from Lady MacGyver...
  • If you have a larger screen, use a squeegee that is as wide as your whole image. I use a window squeegee. They come in various sizes and can be found at your local auto or home store.
  • Be sure and use only silkscreen ink which is a slow drying ink. Using other inks or paints may permanently clog up your screen!
  • Make sure and wash your screen off as soon as you are done so the silkscreen ink does not dry on your screen forever.
Good luck to you in your silkscreening endeavors!

Tuesday, May 15, 2012

Knock-Down Doll Mania!

Welcome to the Tillie Knock-Down Doll Manufacturing Facility! The past few weeks I've been knee deep in orders for my popular arcade game doll... and it's not over yet!

First I had an Art Show to get ready for. I wanted to make sure I had enough to draw a crowd.

Next, the Bamboozle Concert is coming to the Asbury Park boardwalk this weekend, so I wanted to have plenty for Bamboozlers to buy as souvenirs.

And simultaneously, I've been working on a wedding order for 30 custom dolls for a couple doing a boardwalk theme! So I definitely want to make the happy couple... happy!

About two more weeks of work to go and I can breathe again!

Thursday, May 10, 2012

Ocean Grove Music & Art Festival


If you're local to Ocean Grove, New Jersey... come visit me at the Music & Art Festival this Saturday, May 12th. Set in the gorgeous Auditorium Park, this fair boasts music all day and one-of-a-kind art and craft items by local artisans. I'll be there with my unique art and upcycled jewelry, boardwalk themed items, my new vintage rag doll creations and so much more! It's a great opportunity to pick up that last minute Mother's Day gift! Hope to see you there!


Ocean Grove Music & Arts Festival
Saturday, May 12th • 10am - 4pm
Auditorium Park • Ocean Grove, NJ
Click here for more information


Thursday, May 3, 2012

Thoughtful Thursdays: Playing With Symbols!

I've been playing around with symbols and mark-making in a primitive, childlike way lately — thanks to my online workshop with Mindy Lacefield. It's interesting when you're actually given the assignment to find out what kinds of symbols you like and what kind of marks you are drawn to! (hee-hee.... get it? drawn to)

So I finally signed up for a Pinterest account and I looked for various examples that sparked something in my brain. I realized that I like stars... scribbly springy marks, houses, flowers, and the use of text as a design element.

I like rainbows and clouds and hearts... as well as childlike scrawlings of letters and numbers.

And swirls. Boy do I love swirls! Especially with my non-dominant hand.

Oh, and raindrops. I'm having way too much fun with raindrops.

Oh, and... well... I'm not sure if food is considered a symbol... but you know me! There's bound to be some sweet treats in my art.

I have to admit that although it is fun to uncover where my tastes lie when it comes to symbols and mark-making... it's a little tough figuring out how to incorporate them into a piece of art and make it cohesive. I'll let you know how that goes!

In the meantime... what are some of your favorite symbols?


Tuesday, May 1, 2012

Cloudy With A Chance Of... Ragdolls!

This past weekend was spent distressing and stuffing and sewing... and sewing and stuffing and distressing my motley crew of modern vintage rag dolls!

I used a wash of two different brown acrylic paints to give the dolls an aged and distressed look.

Not enough room for all my dollies to dry...they're all heaped up on top of each other!

The paint actually ended up drying to a strangely mottled, greyish hue. That's what i get for using linen purchased at a rummage sale. But hey... they look really old and distressed now!

I tried to make each one unique and utilize a few unconventional embellishments... like this dishcloth nose (shhhh... don't tell mom... it was a gift from her!).

Of course I had to make some sweet treats... and these 3-tiered cakes were no exception. Yum! I tried some distressed and left some plain... just to see which style looked better. I think they both have their merits. 

And I'd have to say that even though I left some things to chance... they all measured up to my expectations! I'm excited to introduce them at my first Art Show of the year in two weeks... hurray!