...but we can certainly get into making a funky fabric cuff! After months of painting all kinds of folk art, primitive and cutesy girls, I had an urge to totally change directions and make an artful adornment for my arm. I did a little research and found
this awesome tutorial and wanted to get started right away!
I also remembered that my lovely and talented friend Claudine Hellmuth had done a how-to video on
creating a convertible brooch pendant with her StickyBack Canvas product. So I took her flower idea and used it as a jumping off point for this fabric cuff. Her technique made it super easy and fun. The base of the cuff and the flower are both made with StickyBack Canvas (oh, and I saved the extra strings to make the little nest of fibers there).
The cool thing about StickyBack is that... well... it has a sticky back! So I peeled off the backing and stuck my cuff onto a piece of muslin that was a half inch wider than the base. Just to create a little interest around the edges. Of course I'm doing things totally out of order because I was just so excited (and kind of making it up as I went along)!
And then it was time to add some accent flowers. I wanted to alternate between the stamped StickyBack Canvas and the muslin, but when it came time to add my second flower... the perfectionist side of me had a few questions. What if the placement is off? What if you come up short? Or it's not centered? So I had an idea! I took the waxy paper from the StickyBack and used it as a non-stick base for my flowers. I put down some tacky glue, made the flower the exact size I wanted it, and let it dry overnight. Peeled it off the next day and.... voilà!
A perfect flower I could place anywhere I like! Just a little Tacky Glue to affix it to the cuff... and we're on our way!
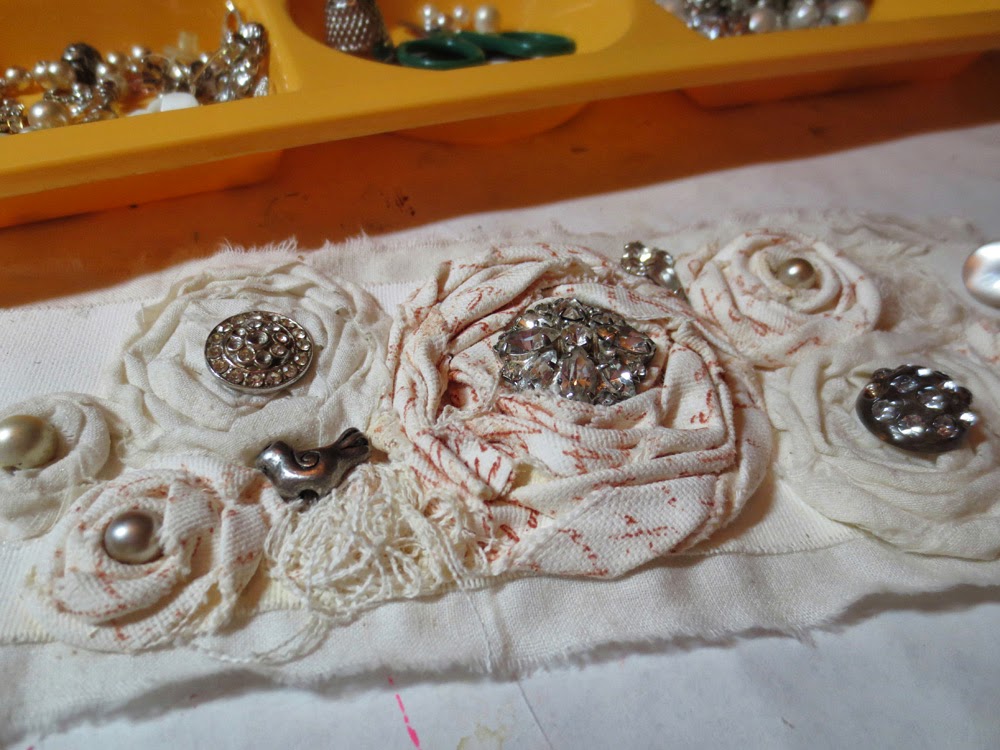
Made more flowers. Picked out some vintage baubles to accessorize. I sewed the buttons on. Oh, and I don't know how to do a button hole on my sewing machine yet, so I just cut two slits in the fabric. Hey, it works. More flowers. More fiber nest thingies...
Picking out jewels and beads to match was lots of fun. Went through like a gazillion combinations. And sewed them on very carefully. It took many decades to acquire all that junk.... ahem... I mean, jewels.
When I was done I had completely surprised myself. I thought. I searched. I gathered. I conquered. One of the things about the internet that I actually love... You can think of something you want to do... sit in one place and do tons of research... and find what you want to create... and then get to create it right then and there! Ahhhh... impatient crafters... we are saved!
And look at all that textured goodness. Isn't it just yummy! I love the tattered and worn look this funky fabric cuff has. Combined with vintage goodies from my stash... this new accessory is going to get worn out in no time. Or is that worn in? Hmmmmm.....


this looks so fabulous michelle!!! LOVE LOVE!!!
ReplyDeleteThanks Claudine!! And thanks for your super shortcuts to inspire me! Hooray for StickyBack!
DeleteSuper cute! Great job! Love it!
ReplyDeleteThanks Thespoena! And thanks so much for your awesome blog tutorial that sparked the inspiration for this piece of arm candy.
DeleteCool jewels ! Plus you get to look at some of your favorite stash pieces whenever you want. Love it !
ReplyDeleteOoooh! So very true, Kim!!
Delete